If you ask me what is my favorite breakfast menu for a typical Bengali Sunday, without any hesitation my prompt answer will be Radhaballavi,Cholar dal r laal jhaal jhaal Alur Dom. And ofcourse there should be a mishti (sweet) on the plate.It was always my dream menu from my childhood which I hardly achieved in reality. In my mom’s kitchen radhaballavi wasn’t allowed as Sunday breakfast. Never, ever. The one and only answer was, “amar oto somoye nei ekhon, lunch ta ke korbe tahole?” (I don’t have time for it now, who will arrange the lunch then?)
The only place where I used to get this Radhaballaviin unlimited version was, Onusthan bari(Ceremony house). They used be my heaven then. There none ever told me that they don’t have time to make it or it’s too heavy or oily or whatever excuses you can imagine on Mother Earth. There is hardly any Bengali Biyebari(Wedding ceremony) or any other ceremony where radhaballavi in not in the menu on breakfast. Most of the times it is also served as an appetizer during lunch/dinner. Now that was a incentive for me though I never could finish more than two. That was the saddest part to me.
Yes there was another time of the year when I could actually have them on every morning. Ofcourse store bought. (who cares?) That was during Durga Puja or Durgotsov. My father made a rule for those 5 days that there should not be any rules to follow 😀 yeah. Those were my happy days (read, Radhaballavidays).
Ohh those were the good old days. Now I live far away from Kolkata or Bengal. Here I can’t even get smell of radhaballavi 🙁 During last year Durga puja I was here only. For the first time in my life I was away from Kolkata on puja days. I never even imagined in my wildest dreams that I could do that. But on the other hand, that’s called Life. Anyways, including all other charms of kolkata Durga Puja I was missing my radhaballavi days also. But in a local puja pandal I found a stall of radhaballavi. And I was delighted. Without wasting any good time I noted down the address of the store and actually got there on the Sunday just right after the puja. It was delicious. But sad part they prepare it only on Sunday mornings, till 11.30 am.
Alas! I couldn’t continue that for very long. It’s not nearby and it was getting difficult to cut down on Sunday’s extra sleep and move over my sleepy bum there. Yeah it is true, if it will be a fight between morning sleep and breakfast; definitely the sleep will be the winner. (Those Tropicana guys are so damn right!)
Ok now again back to my story. Here my search of radhaballaviactually started and finally I ended with a bunch of recipes in my hands. Happy me tried and tested. But again as they say, there is a no complete story without sad part, I failed. All I got was the recipe of dalpuri not radhaballavi. Not completely my fault. I dint know the difference between radhaballaviand dalpuri. And top of all I dint even know how to cook that time. Again search began and now it got over as I got correct and perfect recipe of radhaballavi.
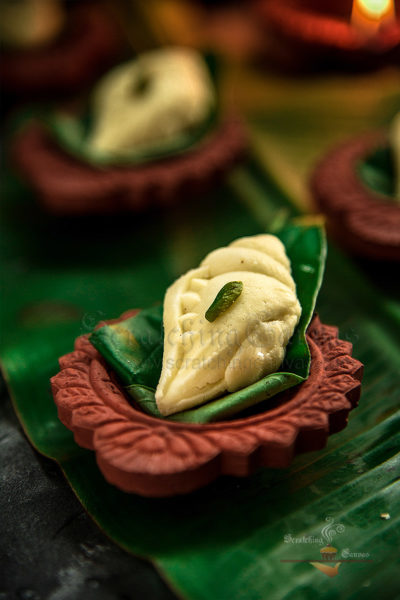
So, here it is guys, the recipe of typical Bong Radhaballavi with Bengali Cholar dal r Alur Dom. And for my sweet tooth I made some Kalojam (Kala Jamun) and Shor bhaja (Shor puriya).
Ingredients for Bhaja Moshla or Dry Roasted Spices:
Dry red chilli: 4-5
Cumin seeds: 1 tsp
Preparation for spices:
Take a nonstick tava and keep it on high flame. Once the tava is hot, turn the flame to medium-low and add dry red chillies and cumin seeds separately. Dry roast these two individually. (See Tips)
Use a dry grinder or coffee grinder to make powder of these two spices together. (See Tips)
Keep this powder aside orf later use.
Ingredients for filling:
Urad dal: 1 cup
Ginger: 1”
Green chillies: 4-5
Asafetida/ Hing: 1 pinch
Fennel seeds: 1 tsp
Caster sugar: 1 tsp
Salt to taste
Oil: 2 tsp
Preparation for filling:
Wash and soak the Urad dal a night before you are planning to make Radhaballavi.
It is important to soak the dal over night to soften the dal.
On the next day you will notice that the dal has almost doubled in volume. Drain excess water. (if any)
Wash once again. You will notice the dal has become very slippery by now.
Wash ginger and green chillies too.
Now arrange dal, ginger and green chillies in wet grinder/ blender and make a paste of these by using as little water as possible. (See Tips)
Take a nonstick wok and heat oil. Add caster sugar.
Add pinch of asafetida and fennel seeds. Let it sizzle.
Add dal paste. Keep stirring continuously. (See Tips)
Once you notice dal is coming together, add dry roasted powder and salt as per your taste.
Keep mixing the spices with the dal on high flame.
Once it is done remove it from flame and keep aside. Let it rest for few minutes. When it gets a bit cold but still warm take 1 tsp of it and make small ball. Do same with the rest of the mixture or as many you require.
Ingredients for poori (outer skin):
All-purpose flour: 200-250 gms.
Warm water: 1/4th -1/3rd cup
Salt to taste
Oil: 2 tsp (to knead the dough) + 2-3 cups for deep frying
Preparation for poori (outer skin):
Sieve the flour in a large bowl.
Make well in the center of the flour dump.
Add salt and pour oil in the well.
Mix it together in such a way that it looks like crumble.
Again make a well in the center. Pour warm water little by little to make a soft dough.
Use a damp kitchen towel to cover the dough once you are done and leave it for 30 mins.
Aseembling:
Make small balls from the dough. Keep them in a line. (See Tips)
Take one ball at a time in your palm. Press gently by other hand’s thumb. Now press the edge gently to make it bigger and flatter but without touching the center. (See Tips)
Follow the same procedure for rest of the balls and maintain the line.
Now add a ball of filling to each flour pattie.
Take each ball at a time in hand and seal the edges by gently pressing and stretching the dough.
Make sure there is no crack at all around the dough. Try to give it a round flat pattie shape. Follow same procedure for rest of the balls.
Pour few drops of oil on the clean kitchen counter (or wherever you are planning to roll the dough) and place one dough ball at a time.
Roll it with a rolling pin carefully. Stretch it as much as possible but be careful to not make cracks on the surface. If crack appears on the surface of the pattie stop stretching immediately. Otherwise it will be a wastage. (See Tips)
It final pattie should be bigger than ordinary poori’s size and a bit thicker too.
Take a nonstick wok with 1/3rd of it filled with oil. Heat it on high flame. Once the oil is hot simmer the flame. (See Tips)
Add Radhaballavi slowly in the hot oil. Be careful not to spill the hot oil.
Remember it should be one Radhaballavi at a time in the oil. It will go down to the bottom of the wok and immediately will float on the top.
Increase the flame to medium-high at this point. Keep pressing the Radhaballavi in the middle very gently with the ladle and at the same time keep rotating it.
Once you can spot that the Radhaballavi is changing its color to golden, immediately turn over the Radhaballavi and keep following the same process for the opposite side too.
Within few seconds this side will also change the color and it will turn to pale red. This is the time to remove your Radhaballavi from oil and keep them on paper towel to get rid of excess oil. (See Tips)
Tips:
1. Don’t try to dry roast spices together. Dry red chilli and cumin seeds take different amount of time to get roasted. By the time one will be perfectly roasted the other will be either half roasted or burnt. So make sure you dry roast them individually.
2. Wait atleast 8-10 mins before you open the lip of the grinder after your grind. As it contains red chilli, if you try to open the lip immediately the chilli flakes can harm your eyes and face. So wait few mins to make sure powdered-spices get settled.
3. Remember, while you are making paste of dal, more water you will add to it, more time it will take to evaporate during cooking. As this dal is very sticky, I added only 1-2 tsp of water to make the paste and while pouring the paste in a bowl I used another 3-4 tsp of water to get rid of the stickiness.
4. Be very cautious while cooking the paste of dal. This Urad dal is too sticky to handle. Once it starts sticking, it is harder to mix and cook the dal. But if it gets stuck, don’t worry, keep your cool. Be patient and keep stirring as much as possible. Don’t leave it idle, it will burn in that case. Once you see dal is coming together, then only try to scrap off the dal from the bottom of the pan with a spatula or ladle.Now it will come off without much effort.
5. It is definitely not necessary to maintain the dough balls in a line but it will help you to complete the job neatly and without any trouble.
6. Keep the center of the pattie a bit thicker so that it can hold the weight of the filling. Otherwise it will tear the skin of the pattie while stretching or frying and will cause a mess.
7. If there is any crack at all on the surface of the Radhaballavi, it will split in the oil when you are going to fry.
8. To check the temperature of the oil: drop a tiny ball of dough in the hot oil, if it sizzles and floats on top of the oil immediately it is the right temperature.
9. It is important that you take out the radhaballavi from oil at correct time, otherwise radhaballavi will get brown and crisp instead of being soft.
http://scratchingcanvas.blogspot.in/2012/10/Bengali-Alo-Dum-Complete-Veg-No-Onion-No-Garlic.html


Totally love the post! Awesome. I am waiting with bated breath for Shor Bhaja and Shor Puriya 😀
I'm so glad :).. It's Shor bhaja or Shor puriya and Kalojaam :D… coming soon 😉
Looks so yum and such easy step by step recipes, love all your pictures and bowls
Priya
Cook like Priya
@Priya, yes it is easy only bit tricky.. 🙂
Thanks for sharing but too bad that I can't copy it to keep !! I eaten the plan Poori , yours has filling, very interesting and the filling is healthy too !! Will try it one day.